

The Ultimate Guide to Painting a Room, Step-by-Step Tips for a Flawless Finish
Introduction
I have always loved painting and decorating, it's in my blood! As the daughter of a professional painter and decorator, I grew up in a home that was always beautifully maintained. I can still remember the familiar scent of fresh paint when my dad came home from work and the garage stacked with tins of every color.
Over the years, I’ve learned invaluable painting techniques from my dad and from working in the interior design industry. Now, I’m excited to share my knowledge with you!
In this guide, I’ll walk you through everything you need to know about painting a room, including:
✔️ How to prepare the space for a flawless finish
✔️ The essential tools and materials you’ll need
✔️ Step-by-step techniques to achieve a professional look
Before we dive in, take a moment to assess your space. Your room may fall into one of these categories:
🔹 A new build or recently renovated home—just a simple color change needed
🔹 A well-maintained home—needs a refresh to brighten things up
🔹 An older home in need of repair—new skirting, doors, or patching up cracks and holes
🔹 A space with wallpaper or plaster—requires removal before painting
🔹 A new home you’re moving into—ready for a fresh, personal touch
No matter the condition of your space, this guide will help you achieve a stunning, professional-looking paint job. So, let’s get started!
In this step-by-step guide, I’ll walk you through essential decorating tasks to help you achieve a professional finish:

What You’ll Learn in This Guide
In this step-by-step guide, I’ll walk you through essential decorating tasks to help you achieve a professional finish:
1). Room Preparation – How to get your space ready before decorating
2). Filling Holes & Cracks – The right way to patch up walls with plaster
3). Painting Walls – Techniques for smooth, streak-free results
4). Painting the Ceiling – Tips to avoid drips and achieve an even coat
5). Removing Wallpaper – The best methods for hassle-free removal
6). Painting Baseboards & Crown Moulding – How to add those perfect finishing touches
By the end of this guide, you’ll have the confidence and knowledge to transform any room!
Tools & Equipment Needed for Basic Room Preparation
If your room only needs painting and a few small holes filled, here’s what you’ll need:
Protective Materials:
✔️ Masking tape (Painter’s tape) – To protect trims and edges
✔️ Cotton dust sheets – Best for covering furniture & floors
✔️ Plastic dust sheets – Ideal for protecting surfaces from splashes
Cleaning Supplies:
✔️ Plastic bucket & sponge – For washing down surfaces
✔️ Detergent – Helps remove dirt, grease, and marks
Filling & Sanding Tools:
✔️ Filler knife – For applying plaster to small holes
✔️ Ready-made plaster – Easy-to-use for minor repairs
✔️ Fine sandpaper – Smooths filled areas for an even finish
✔️ Sanding block or small wooden block – Helps apply even pressure while sanding
Dust & Debris Cleanup:
✔️ Heavy-duty vacuum – Ideal for cleaning up dust & debris
✔️ Dustpan & brush – Alternative if a heavy-duty vacuum isn’t available
1.How to Prepare the Room Before Decorating
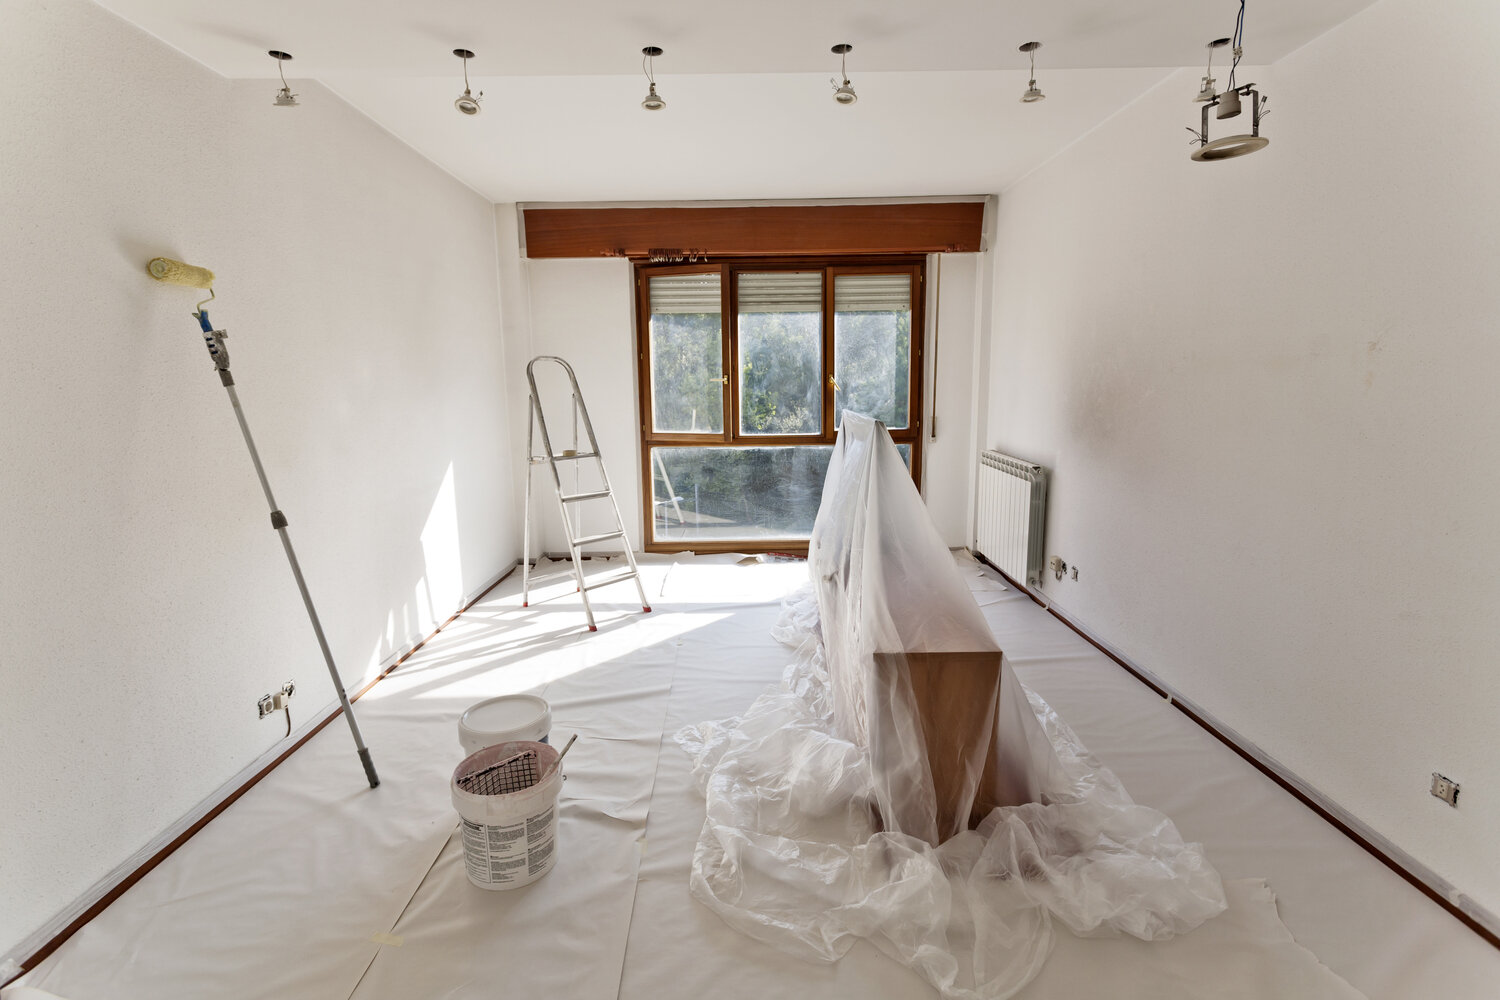
Now that you have the right equipment, it's time to get your room ready for painting! Proper preparation ensures a clean, professional finish and makes the job much easier.
Step 1: Clear the Space
✔️ Remove as much furniture as possible to give yourself more room to work.
✔️ If some furniture must stay, move it to the center of the room and cover it with plastic dust sheets for protection.
Step 2: Protect the Floors
✔️ Lay down cotton dust sheets to cover the floor, these are safer than plastic as they’re less slippery.
✔️ Secure the dust sheets with masking tape if needed, especially around the edges, to keep them in place.
Step 3: Remove or Protect Fixtures & Fittings
Before painting, remove or protect anything attached to the walls and ceiling to ensure a smooth, hassle free painting process.
Take Down Wall Decor & Fixtures
✔️ Remove any pictures, mirrors, nails, screws, and picture hooks if you're not replacing them in the same spot.
✔️ Take down wall lights and ceiling lights if possible. If removing electrical fixtures, turn off the power for safety.
Protect Electrical Outlets & Switches
✔️ Unscrew and remove light switch covers and outlet covers for a cleaner finish.
✔️ If you prefer not to remove them, use masking tape to carefully protect the edges.
Step 4: Clean the Walls & Surfaces
✔️ If your walls are dusty or greasy, wipe them down before painting.
✔️ Use a sponge with warm water and a drop of detergent to remove dirt.
✔️ Rinse with clean water and let the walls dry completely before painting.

2.How to Fill Holes and Cracks with Plaster
For a smooth, professional finish, it's important to repair any holes or cracks before painting.
Step 1: Apply the Plaster
Use ready-mixed plaster and a filler knife to fill holes and cracks.
Spread it as thin and smooth as possible to minimize sanding later.
Let it fully dry before moving to the next step.
Step 2: Sand the Surface
Wear a painter’s face mask to avoid inhaling dust.
Use fine sandpaper on a wooden block or a sanding block for an even finish.
If needed, apply a second layer of plaster, let it dry, and sand again.
Step 3: Clean Up the Dust
Wipe the area with a clean, dry cloth to remove fine dust.
Vacuum or use a dustpan and brush to clean up dust from the floor.

Plaster over any holes or cracks
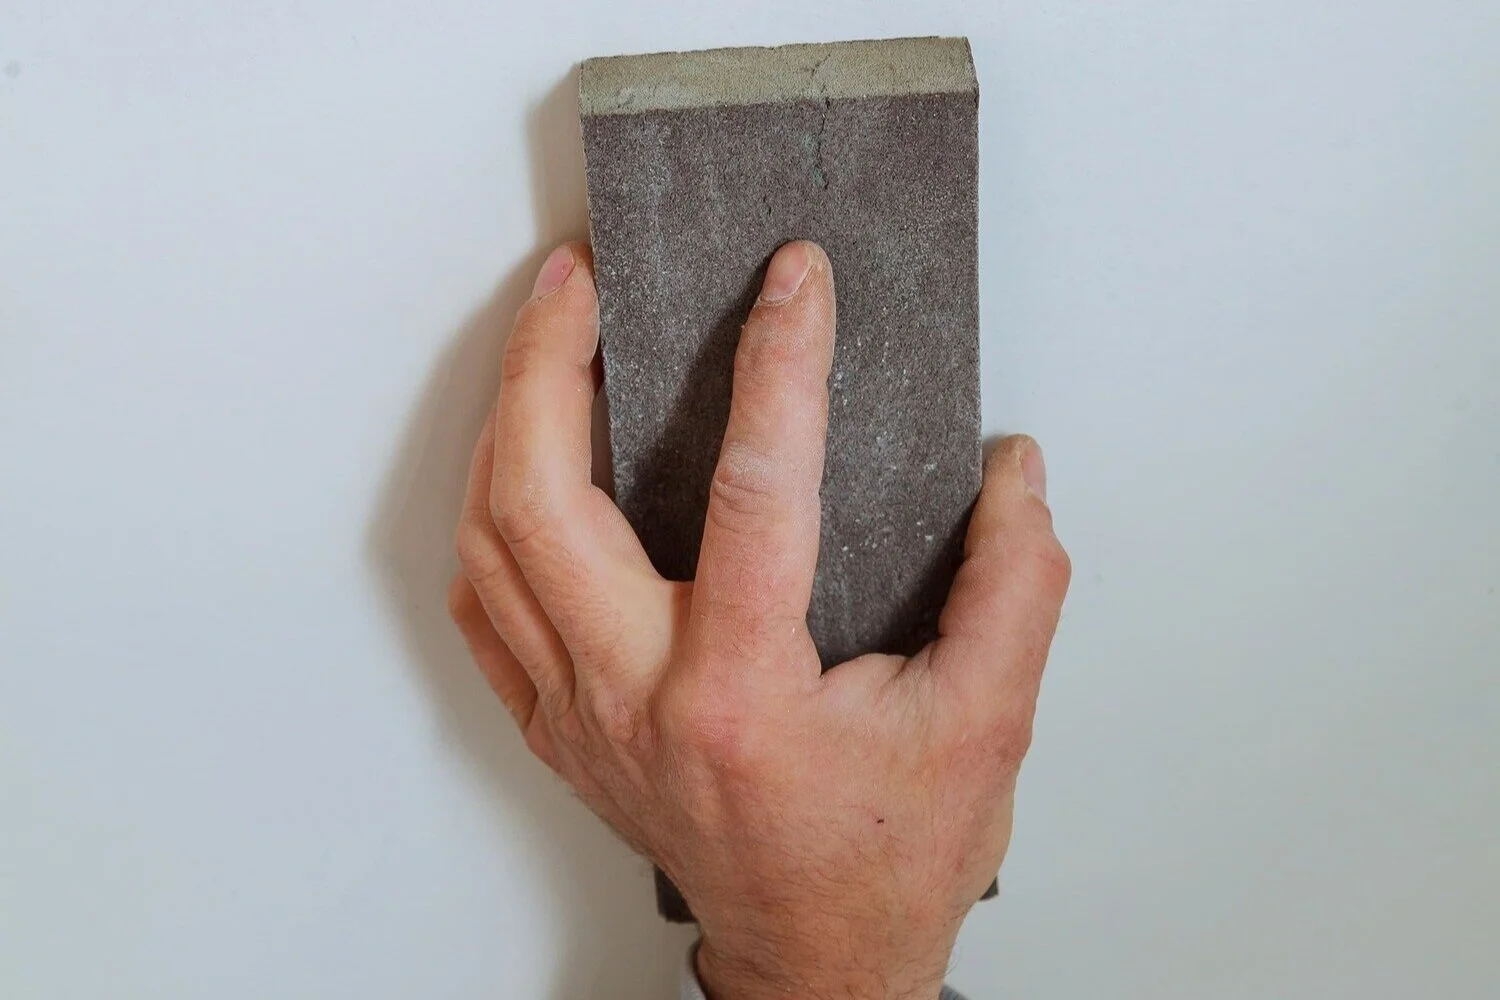
Once the plaster is dry sand of excess with smooth sandpaper on a wood block
Let’s say you are not painting the baseboard or crown moulding then you can either use painter's tape (masking tape) that is a few inches wide to edge the baseboard and moulding. Or if you have a steady hand you can freehand the edges, however, be ready to wipe off any drips or mistakes with a damp cloth. Prepare edges that you don’t want to get paint on including light switches and electric sockets as seen below.

Light switch protected with painters tape
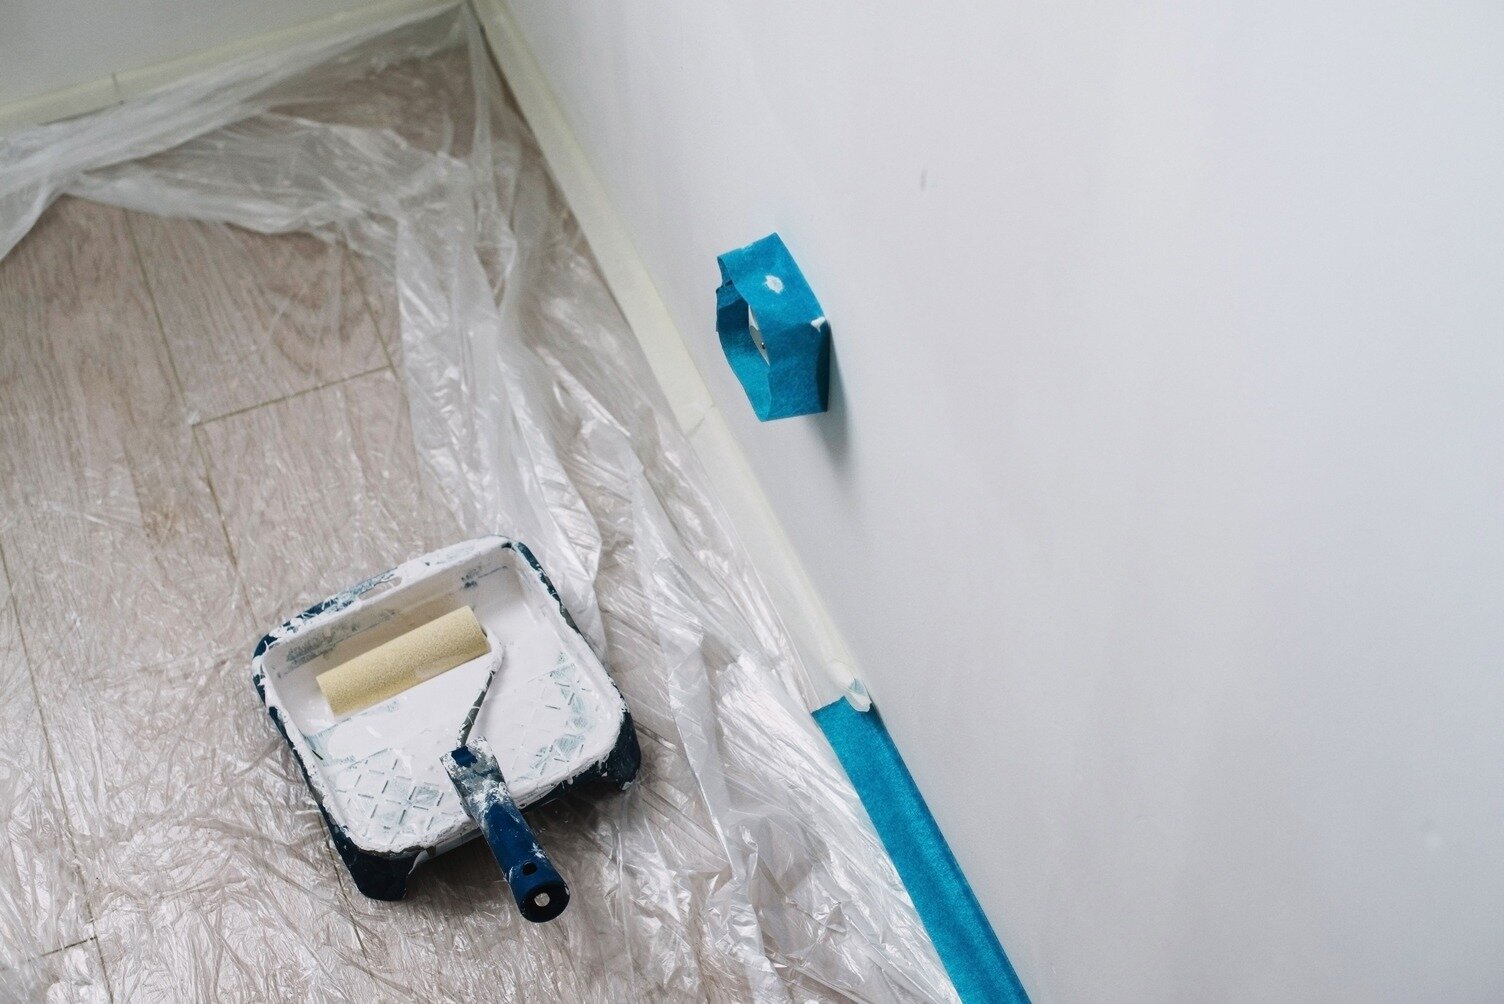
Baseboard protected with painters tape
3 & 4: How to Paint the Ceiling & Walls
Now that your room is fully prepped, it’s time to start painting! A smooth, even finish depends on using the right tools and techniques.
Equipment You’ll Need:
For Cutting In & Detail Work
✔️ Angled paintbrush (2-inch or 2.5-inch) – Ideal for painting edges and corners
✔️ Painter’s tape – To mask off areas you don’t want to paint
For Rolling the Ceiling & Walls
✔️ Paint roller (9-inch with an extension pole) – Speeds up wall and ceiling painting
✔️ Roller tray – Holds and evenly distributes paint
✔️ High-quality paint – Choose ceiling paint for overhead areas and durable wall paint for a smooth finish
For Cleanup & Finishing Touches
✔️ Drop cloths/dust sheets – To protect floors and furniture
✔️ Damp cloth or sponge – To wipe up any mistakes
✔️ Paint stirrer – Ensures even paint consistency before application


3.How to Paint the Ceiling Like a Pro
Painting the ceiling can be tricky, but with the right technique, you’ll get a smooth, even finish with no streaks or drips.
Before you start, make sure the ceiling is clean, repaired, and fully prepped. Protect floors and furniture with dust sheets, and pour your paint into a roller tray (using a liner makes cleanup easier!) as explained in the steps above.
Step 1: Cut in the Edges
✔️ Use a small to medium paintbrush to carefully paint along the edges.
✔️ Painter’s tape can help keep lines crisp if needed.
✔️ Pour paint into a small plastic tub for easier handling while on a ladder.
Step 2: Roll the Ceiling
✔️ Use a paint roller with an extension pole to avoid climbing up and down a ladder.
✔️ Roll in one consistent direction for an even coat.
✔️ Expect some splashes, so wear protective clothing.
✔️ Apply two coats, letting the first coat dry fully before adding the second.
Pro Tip:
Roll towards the main light source (like a window) to help spot any uneven areas while the paint is still wet.
Once the ceiling is done, you’re ready to move on to the walls!
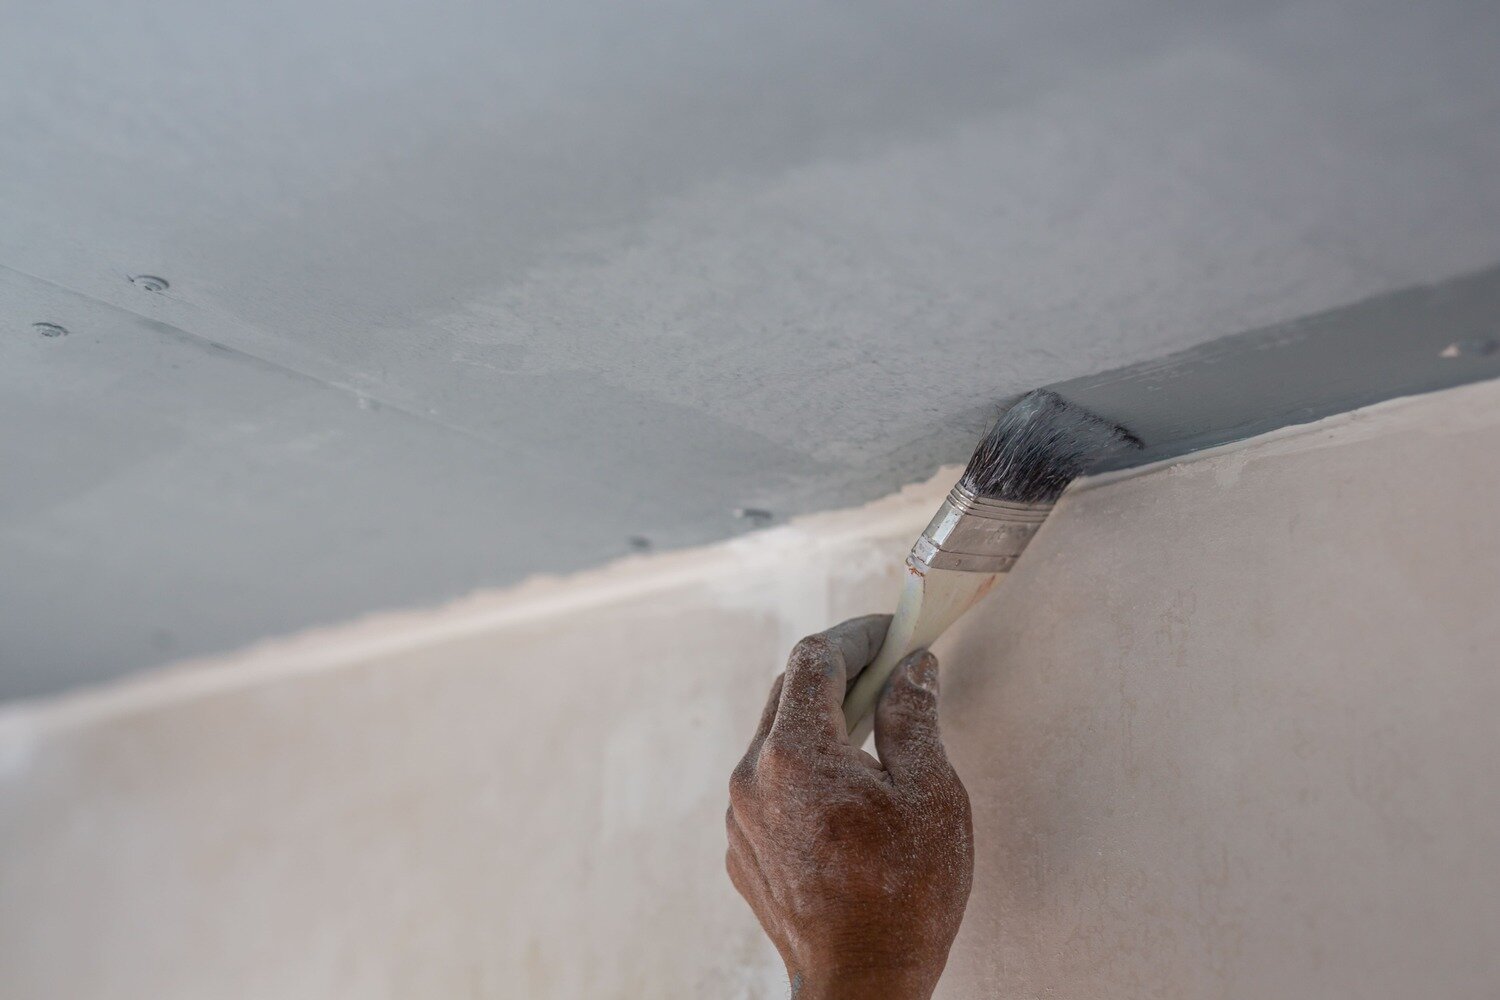
Cutting in the edges free hand can be tricky so use painters tape if you don’t have a steady hand!

Poor paint into a tray with a liner tray to use on the walls and ceiling with saves washing the tray afterwards.

Use back and forth movements in a straight line to keep the paint looking even. For the ceiling use an extension pole.
Photo by Ksenia Chernaya from Pexels
4.How to Paint the Walls for a Flawless Finish
Once the walls are dry from cleaning, it’s time to start painting! Follow these steps for a smooth, even coat.
Step 1: Cut in the Edges
✔️ Use a small or angled paintbrush to paint around:
Crown molding & baseboards
Corners & edges of the walls
Light switches & sockets (use painter’s tape if needed)
✔️ Apply smooth, even strokes, blending the edges slightly into the wall to avoid visible brush marks.
Step 2: Load the Roller
✔️ Pour paint into the roller tray and evenly coat a clean, dry roller.
✔️ Roll off excess paint to prevent dripping.
Step 3: Paint the Walls
✔️ Roll in upward motions for an even finish.
✔️ Work in sections or strips, overlapping slightly for smooth coverage.
✔️ When the roller feels dry, reload it with paint and continue.
Step 4: Apply a Second Coat
✔️ Let the first coat dry completely before applying a second coat.
✔️ For dark-to-light color changes, apply a white base coat first, then 1-2 coats of your final color.
Pro Tip:
For the best finish, roll in the same direction in natural light to minimize visible roller marks.
Once dry, the paint should look even with no patchy areas, leaving you with a beautifully painted room!

5. How to Remove Old Wallpaper Like a Pro
Removing old wallpaper properly is worth the effort—it ensures a smoother, more professional paint finish by getting back to the original plaster.
Tools & Equipment Needed
✔️ Dust sheets – Protects floors from wet wallpaper scraps
✔️ Stripping knife – Helps scrape off wallpaper efficiently
✔️ Bucket of hot water & large sponge – Softens the wallpaper for easier removal
✔️ Rubber gloves – Protects hands from hot water and chemicals
✔️ Step ladder – Helps reach high areas safely
✔️ Dustpan & brush – Cleans up scraps and debris
🛑 For stubborn wallpaper:
✔️ Wallpaper steamer – Uses steam to loosen glue quickly
✔️ Wallpaper removal solution – Breaks down adhesive for easier stripping
Step 1: Soak the Wallpaper
✔️ Use a sponge and hot water to soak a small section (about a few meters at a time).
✔️ Let it sit for a few minutes to loosen the glue.
Step 2: Scrape Off the Paper
✔️ Use a stripping knife to carefully scrape away the wallpaper.
✔️ For stubborn spots, score the wallpaper lightly with the knife to help water soak in.
✔️ Some wallpaper will peel off in large strips, while tougher sections require more effort.
Step 3: Tackle Stubborn Wallpaper
If wallpaper won’t come off easily, try one of these methods:
✔️ Wallpaper removal solution – Apply as directed to break down glue (always read safety instructions).
✔️ Wallpaper steamer – Highly effective but requires caution:
Wear rubber gloves and long sleeves to avoid burns.
Use a step ladder when steaming high areas to prevent hot water from running down your arms.
Follow safety instructions carefully to avoid steam burns.
Pro Tip:
Once all wallpaper is removed, wipe down the walls with warm water to remove any leftover adhesive before painting.
With patience and the right tools, your walls will be smooth, clean, and ready for a fresh coat of paint!


6.How to Paint Baseboards & Crown Molding
Follow these steps to achieve a smooth, professional finish on your baseboards and crown molding.
Step 1: Lightly Sand & Clean
✔️ Lightly sand the baseboards or molding using fine sandpaper wrapped around a wooden block.
✔️ Brush off dust with a dusting brush or cloth.
Step 2: Fill Gaps & Imperfections
✔️ Apply filler along the top of the baseboard or bottom of the molding to seal gaps.
✔️ Wipe off excess filler with a damp cloth for a smooth finish.
Let it dry completely before moving to the next step.
Step 3: Protect Surrounding Areas
✔️ Apply masking tape along the edge of the wall to prevent paint from getting on it.
Step 4: Apply Primer
✔️ Use a wood primer as an undercoat for better adhesion and durability.
✔️ Apply with a small roller for speed or a cutting-in brush for edges.
Let it fully dry before sanding.
Step 5: Lightly Sand & Prepare for Topcoat
✔️ Once the primer is dry, lightly sand the surface for a smooth finish.
Step 6: Apply the Topcoat
✔️ Use gloss, satinwood, or eggshell paint, depending on your preferred finish.
✔️ Apply brush strokes in the same direction as the wood grain for a polished look.
Let it dry completely before removing the masking tape.
Step 7: Reveal Your Perfect Finish!
✔️ Carefully remove the masking tape to reveal clean, crisp edges.
✔️ Admire your beautifully painted baseboards or crown moulding!
Pro Tip:
For an extra-smooth finish, use a high-density foam roller instead of a brush on flat baseboards.


“You create your own decoration. You choose your color, you choose your mood…. If you are depressed, you put some bright yellow and suddenly you are happy.”